Magnetic Drawing Machine
Vlog of midterm project
The aim of this project was make serendipidous art by visualising disturbances to the magnetic field. I decided to use this method of input because I have magnets in my fingers, thereby creating a 3D drawing program that I can use with just my hands.
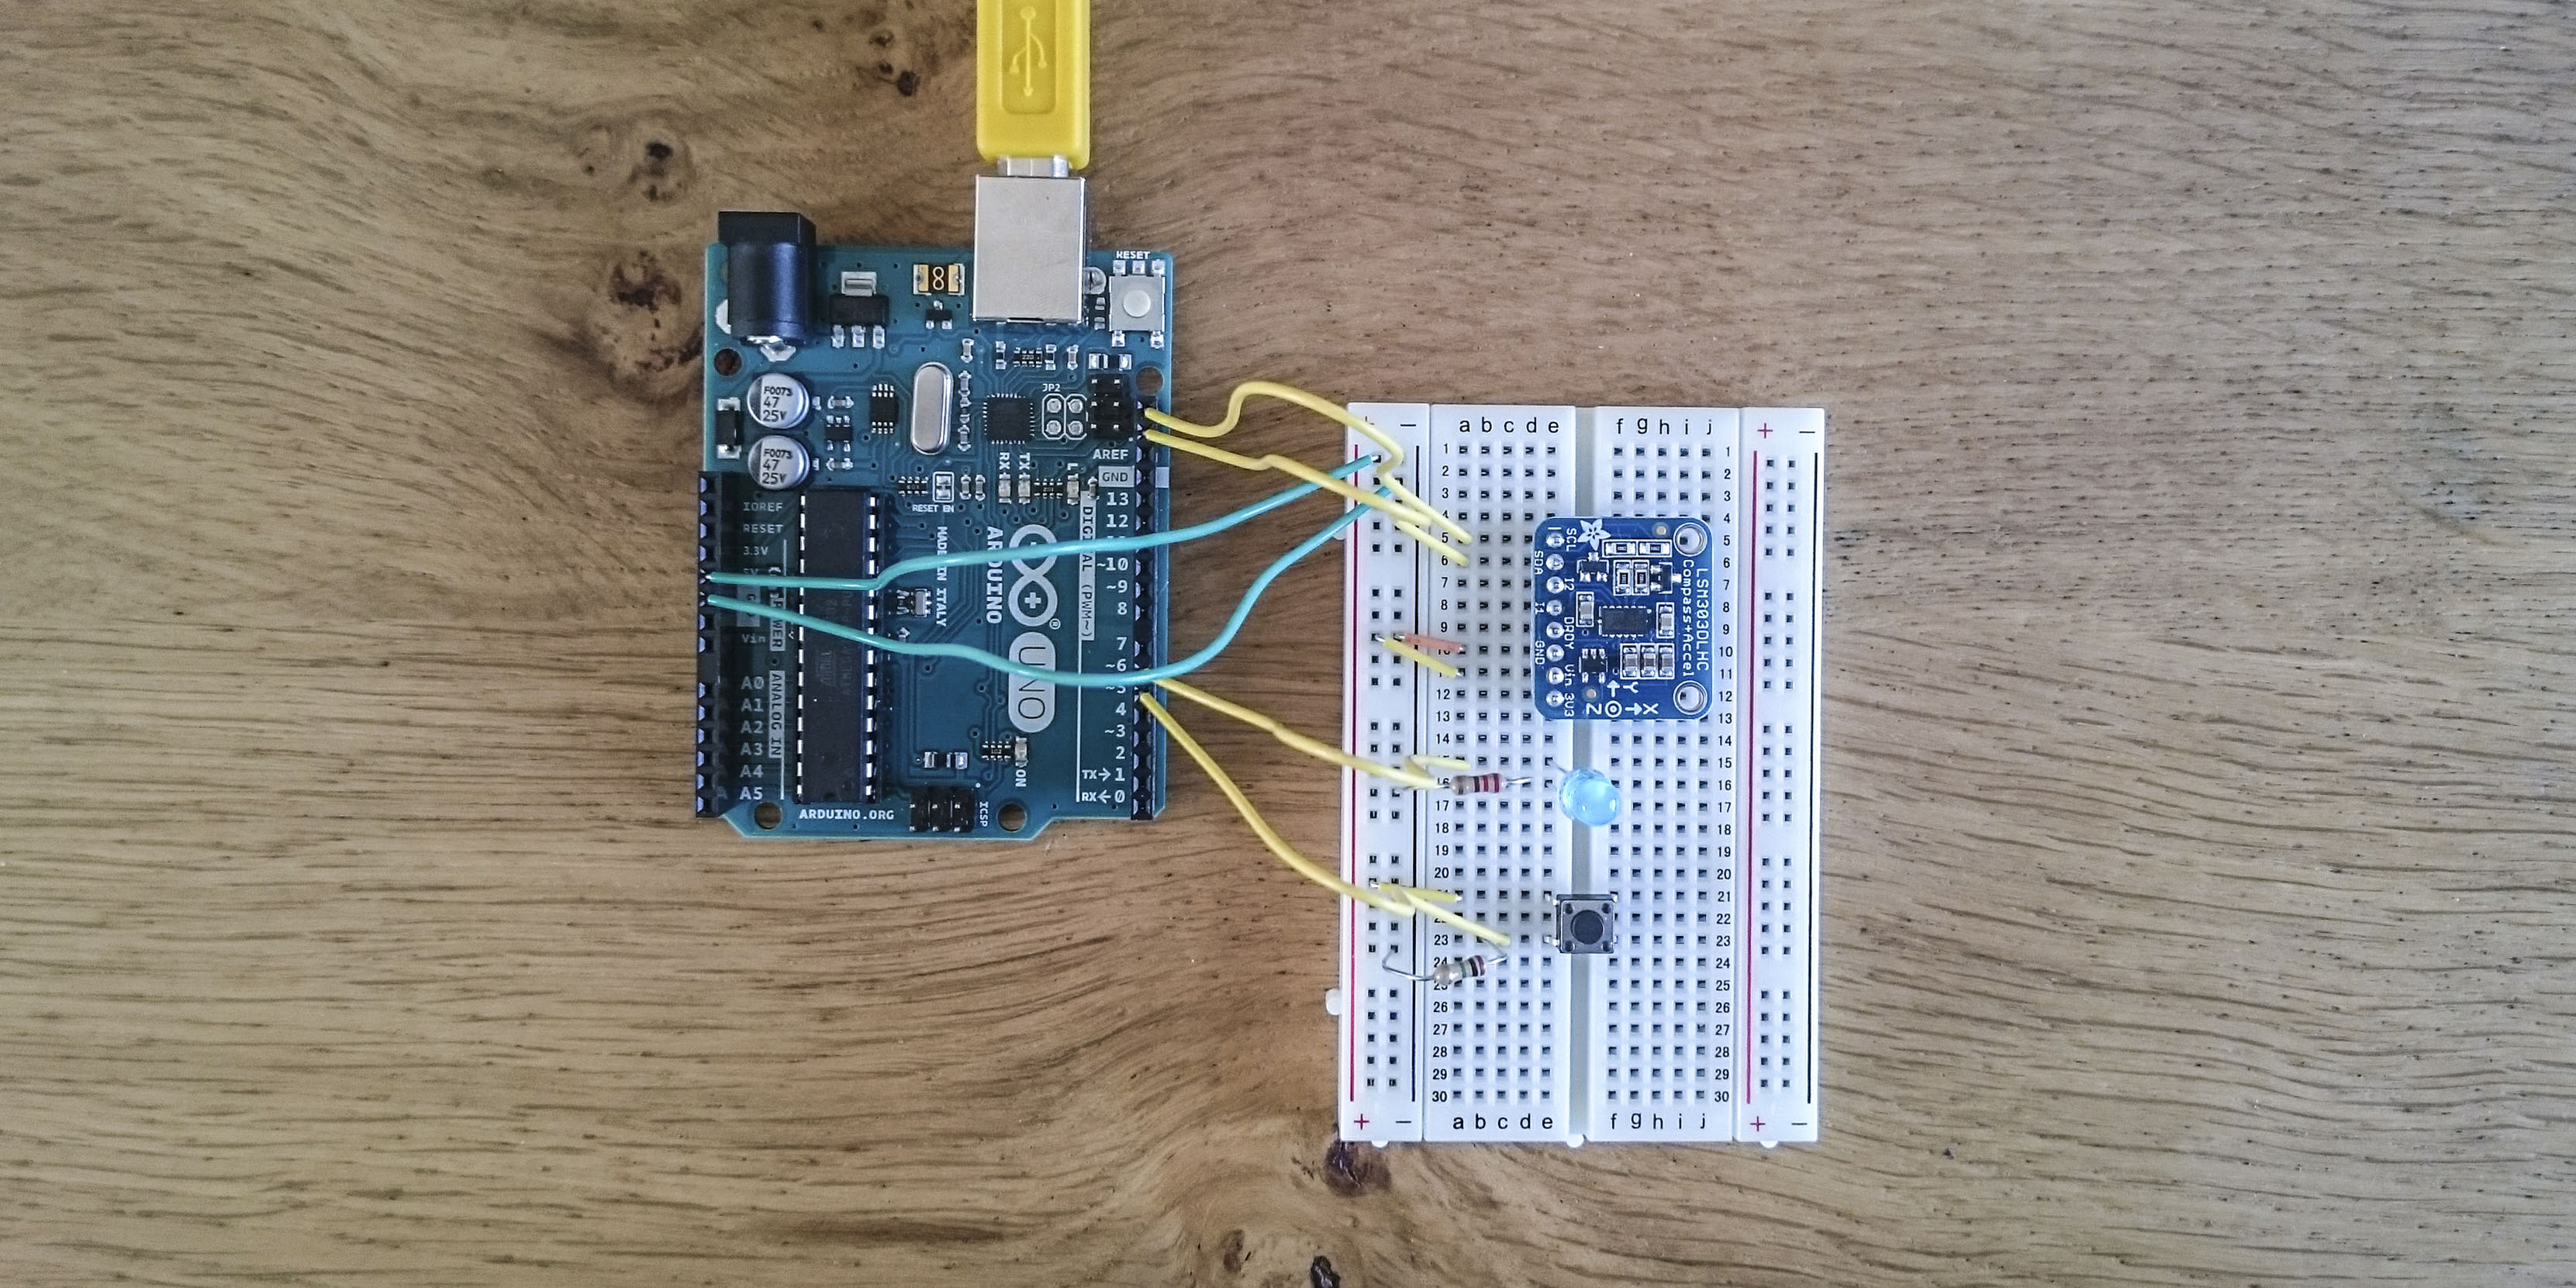
As well as the magnetometer I included a button to trigger/disable the drawing mechanism, and a light to indicate whether it was active or not.
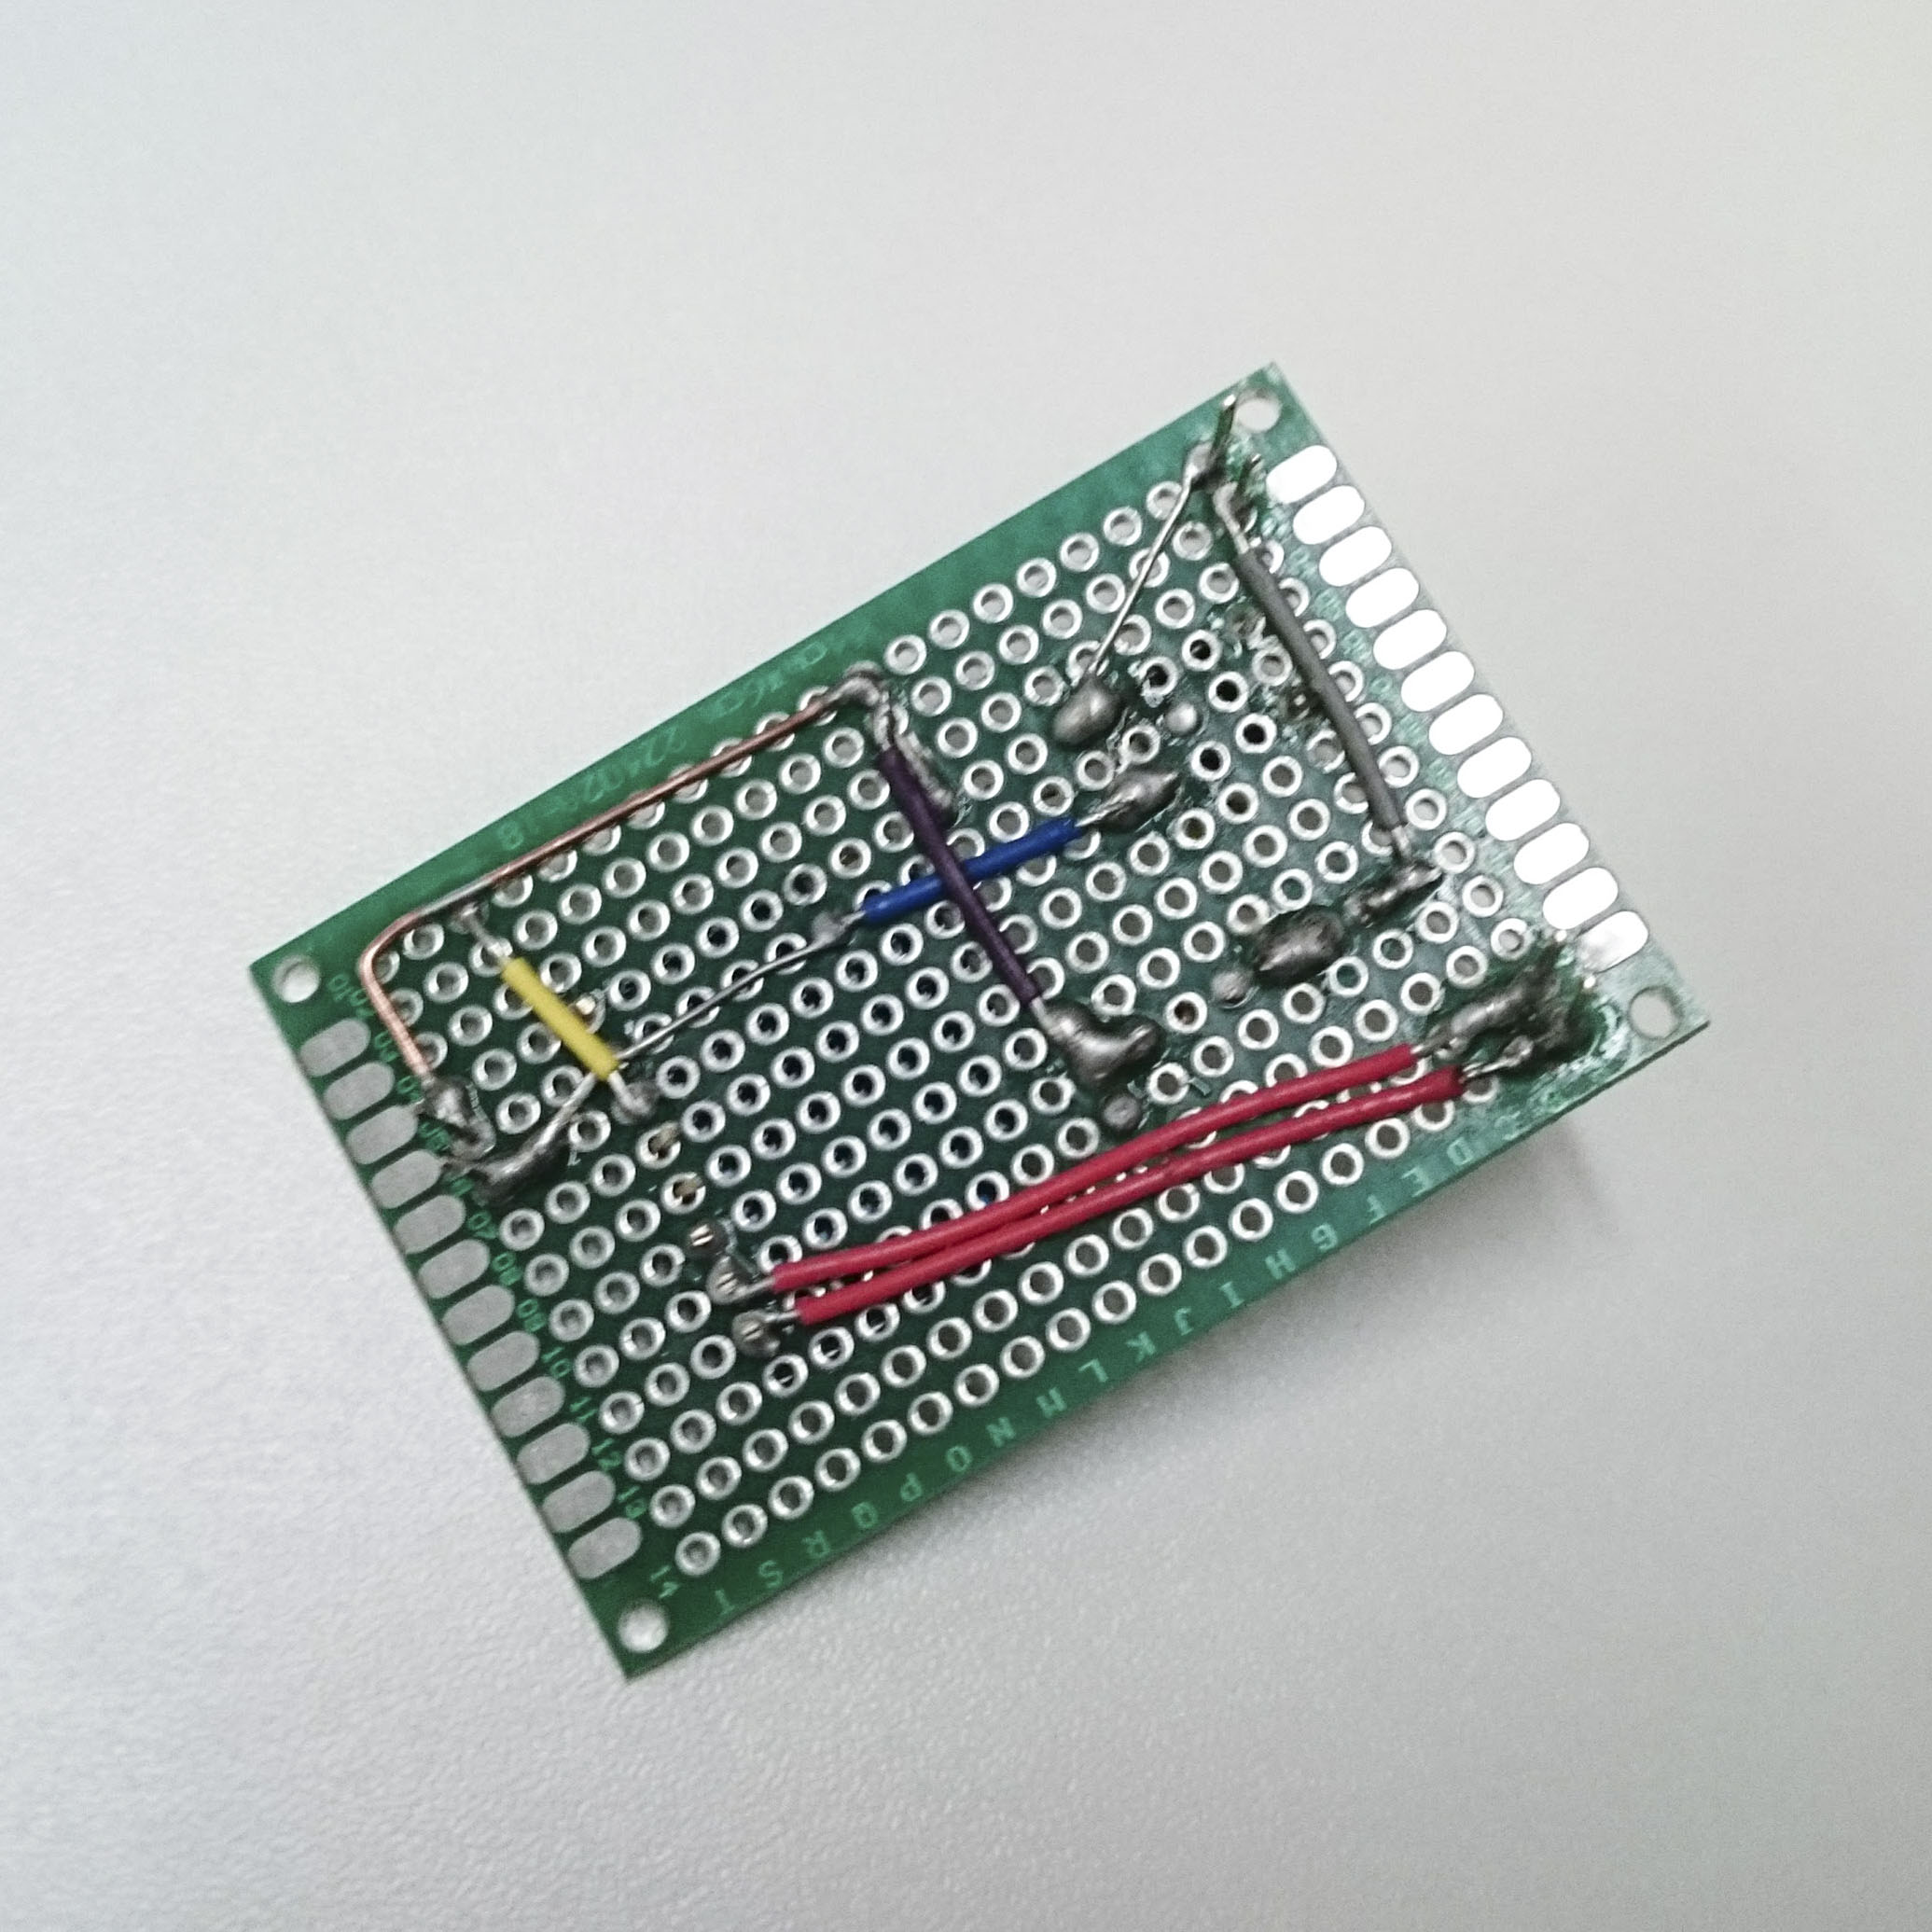
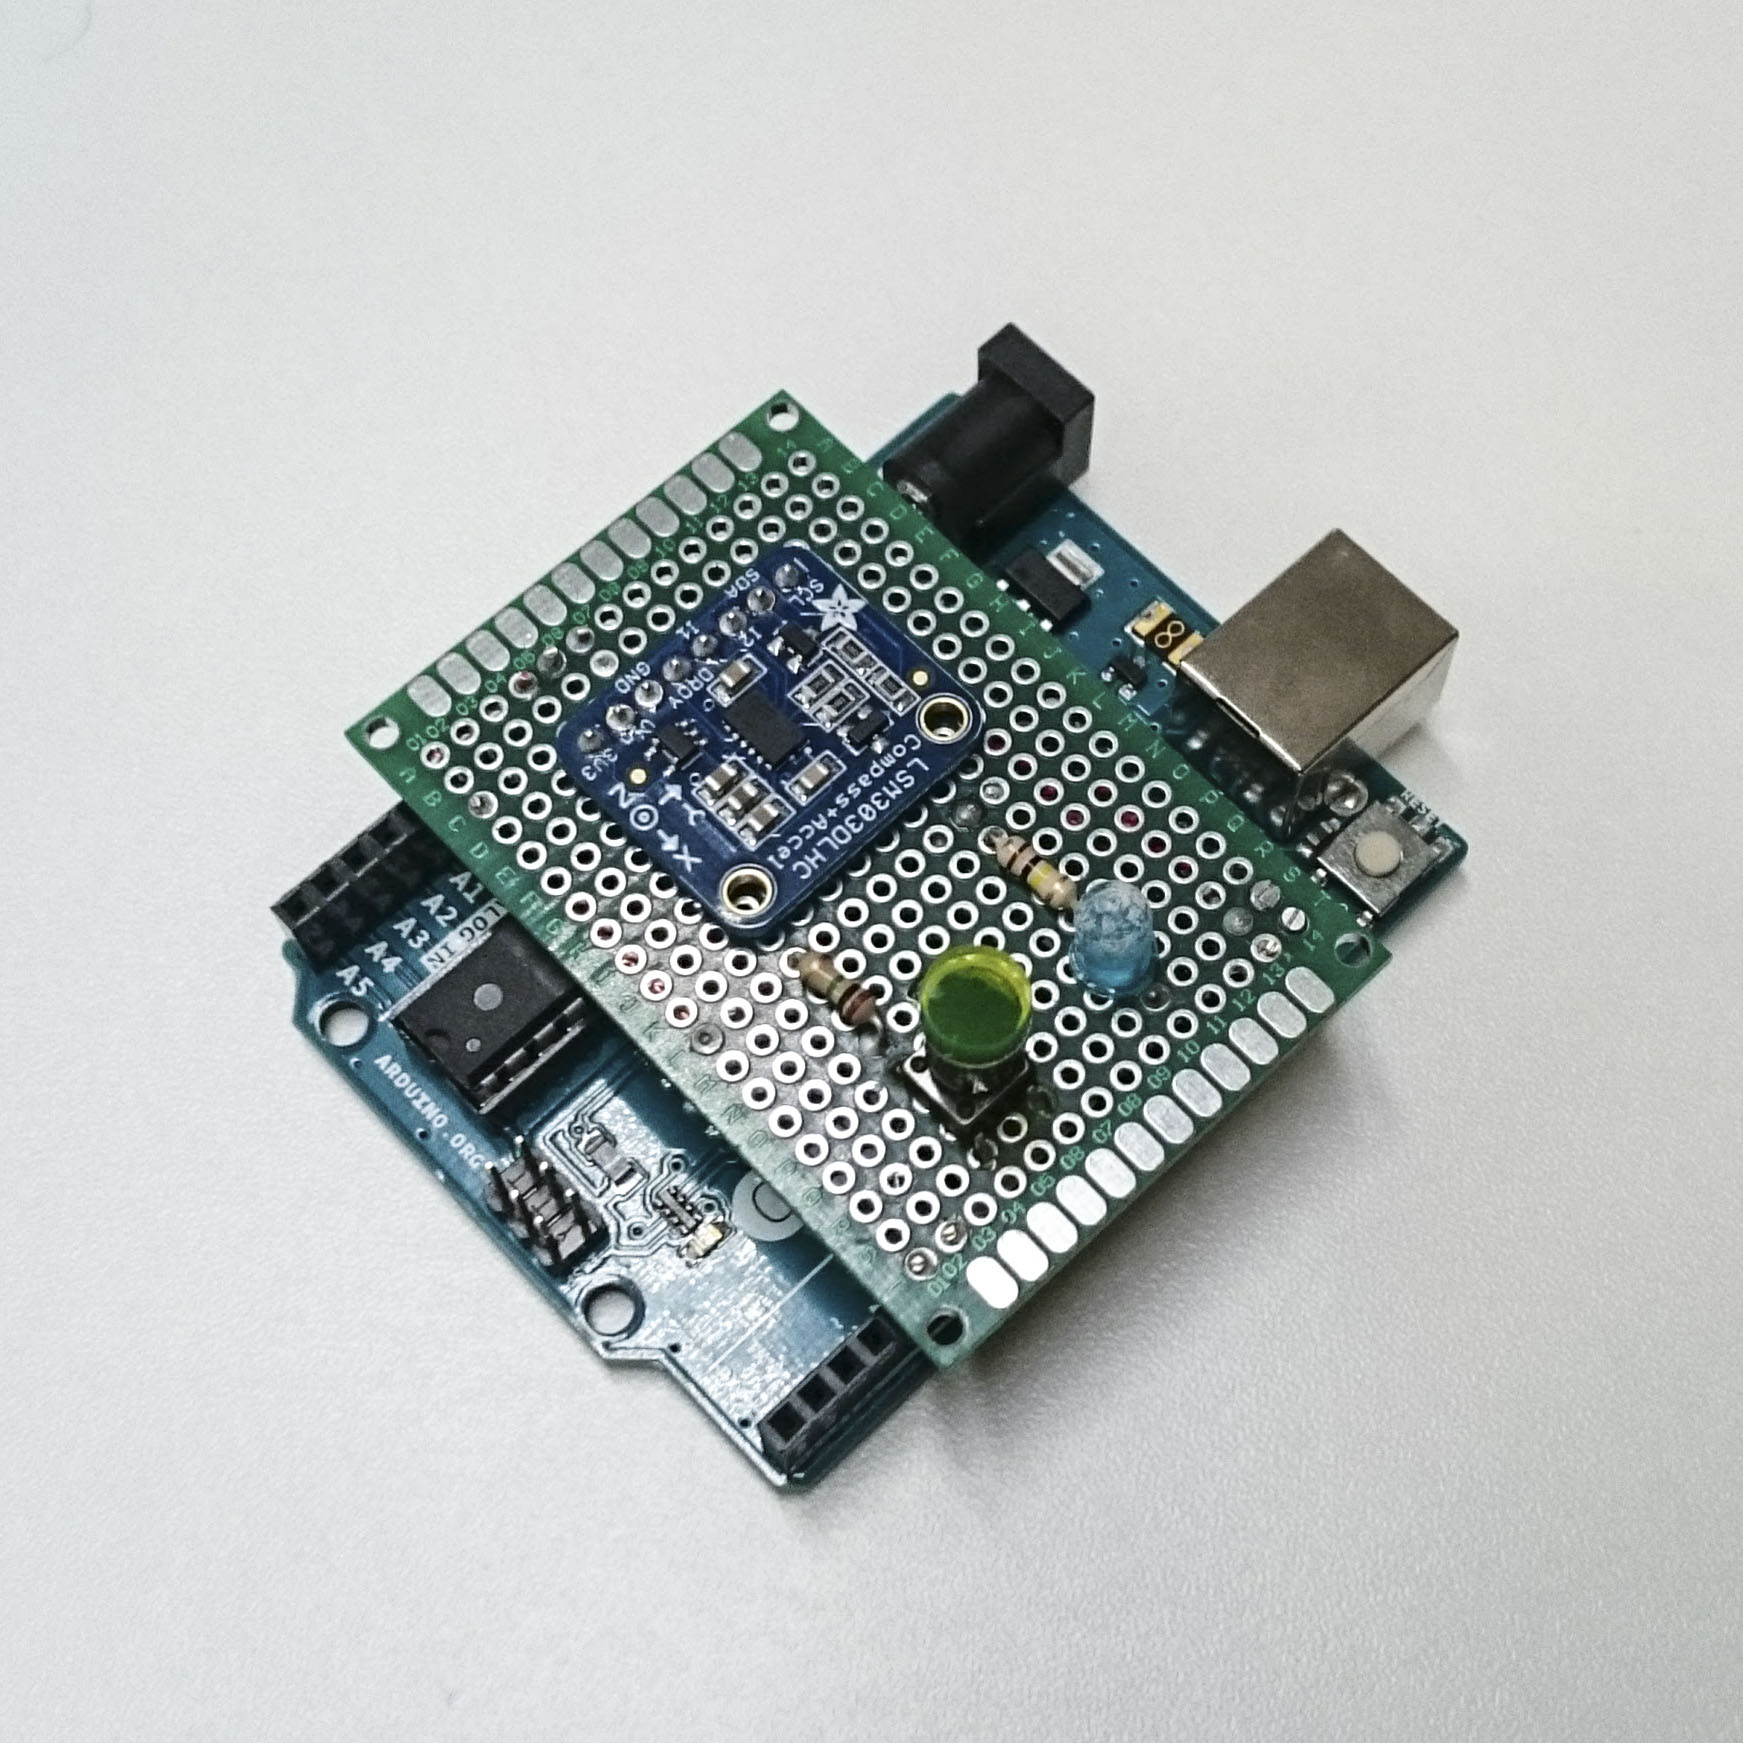
I used a piece of perfboard to make a shield for the Arduino, using wires on the back of the board to solder the components in and headpins to attach it to the Arduino.
I laser cut a custom enclosure for the piece using black and live-edge yellow acrylic, with holes for the USB port, button, LED, and an engraved cross to indicate the centre of the sensor. The enclosure slots on top of the electronics and sits flat on a table, eliminating the need for a backing.
To send the information from the sensor and button to the visualisation program I used JSON-encoded serial data. I used a node.js server to pick up and decode the data, sending it through websockets to a client-side javascript canvas renderer. buzzwords.
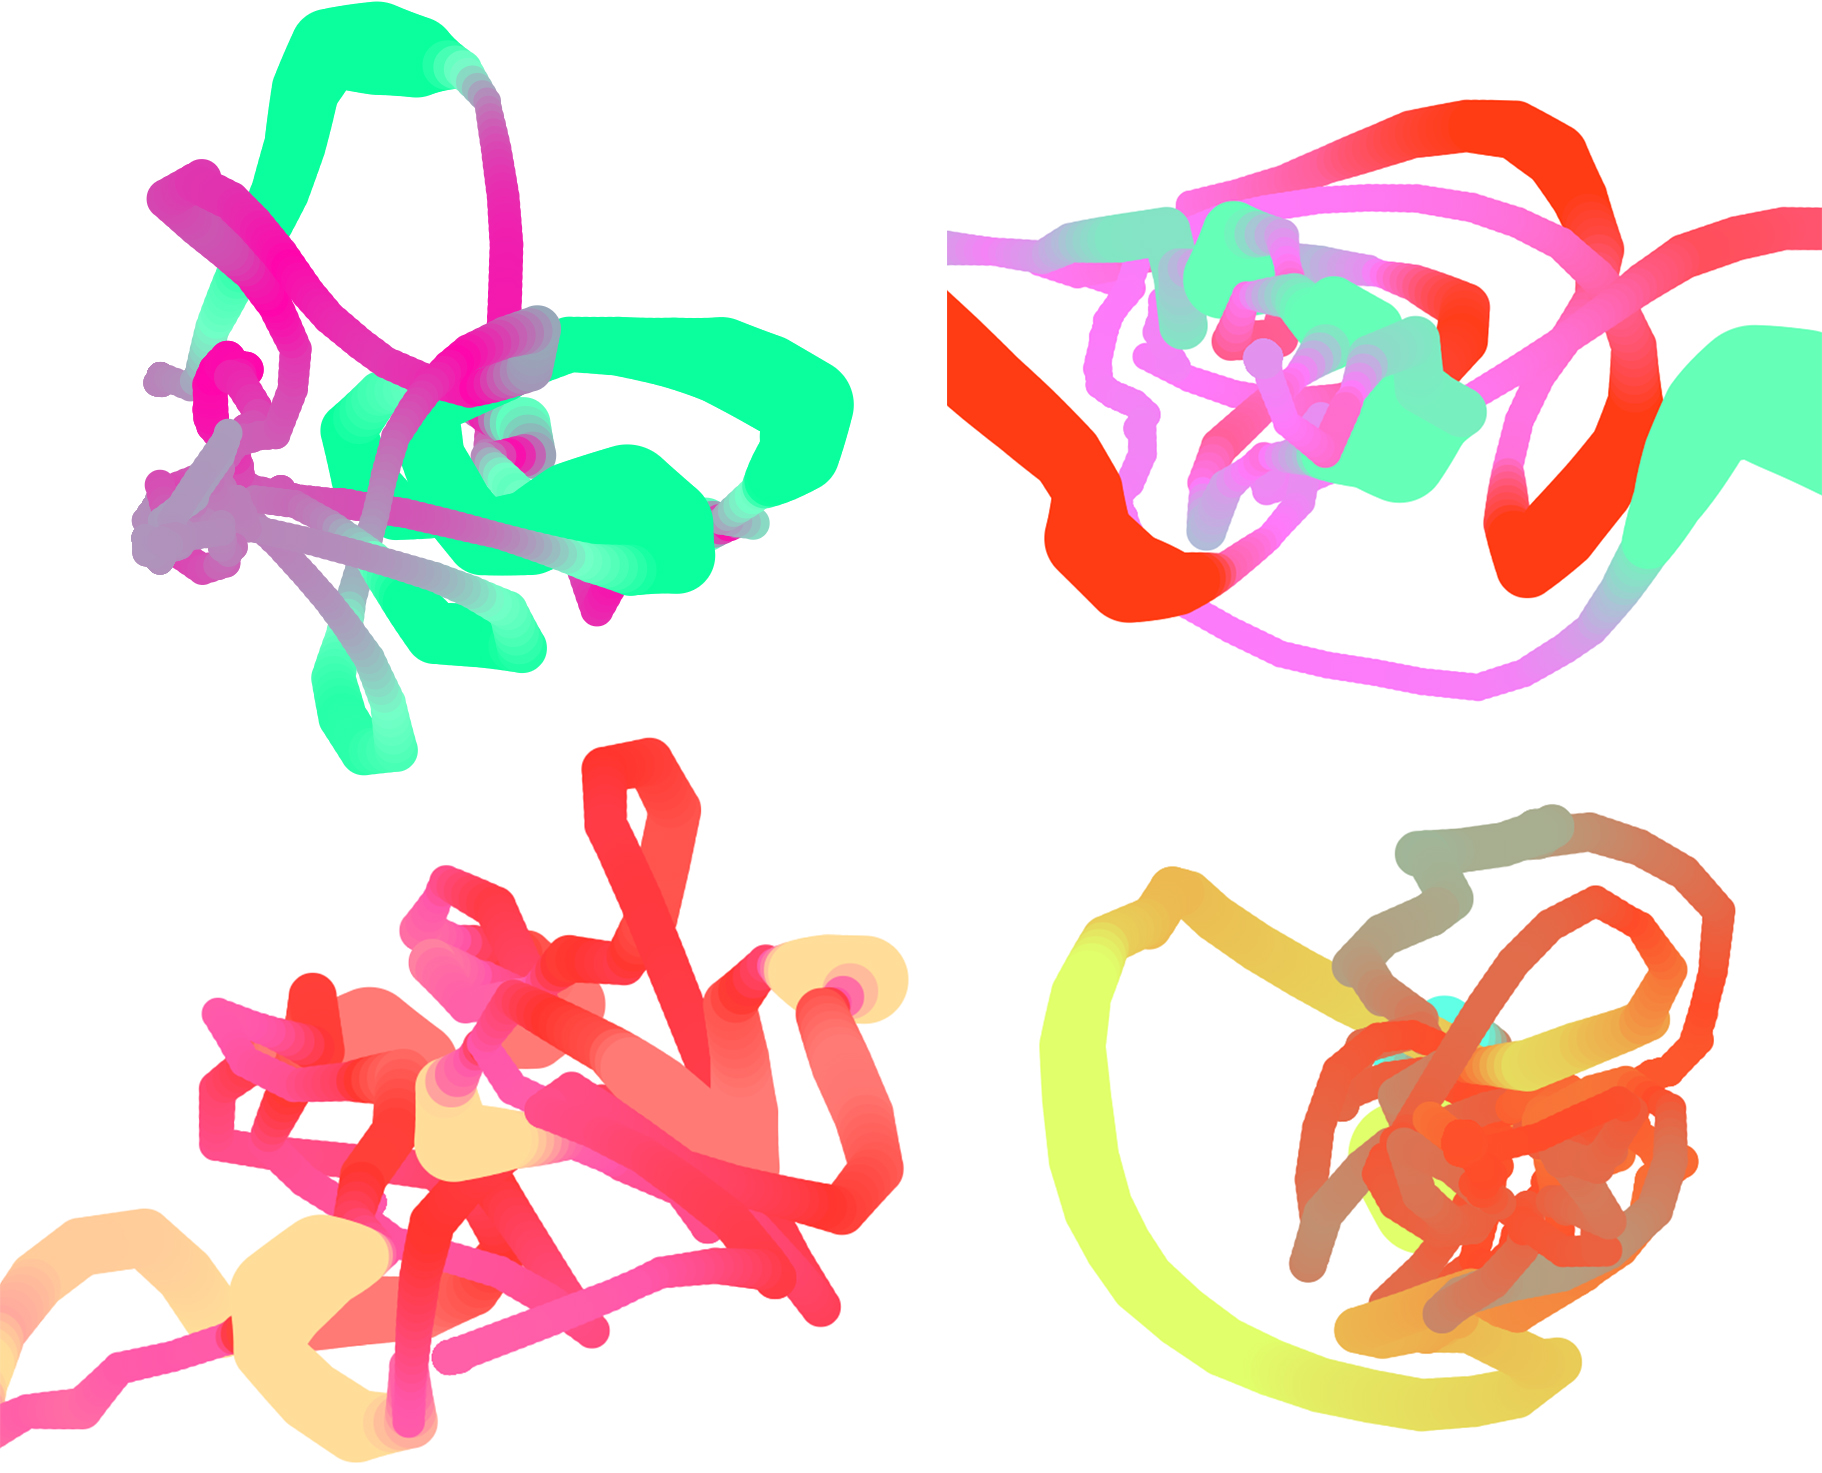
Each drawing normalises the magnetic field and starts in the middle of the screen. It chooses 2-5 colours from an array of pretty hues, and interpolates between them (with the help of chroma) using the Z-axis of the magnetometer. The Z-axis also determines the width of the path being drawn. The X and Y axes correspond to the X and Y of the screen (with the help of victor). To smooth drawing of the shapes I set a constant speed for the particle and directed it towards the target position.
I’m really happy with how the imagery came out. The device is quite frustrating in that it’s hard to control the final output - especially with the interference of the magnet’s polarity - but there is a very clear cause and effect.